Creating and editing geo objects
Creating and editing geo objects
You can track visits to places of interest on the map by creating them as geo objects in the system. This article will help you create new geo objects, teach you how to edit them, and work with all kinds of settings and restrictions on geo objects.
The “Create new geo object” button  is designed to create a new geo object using the geo object editing mode
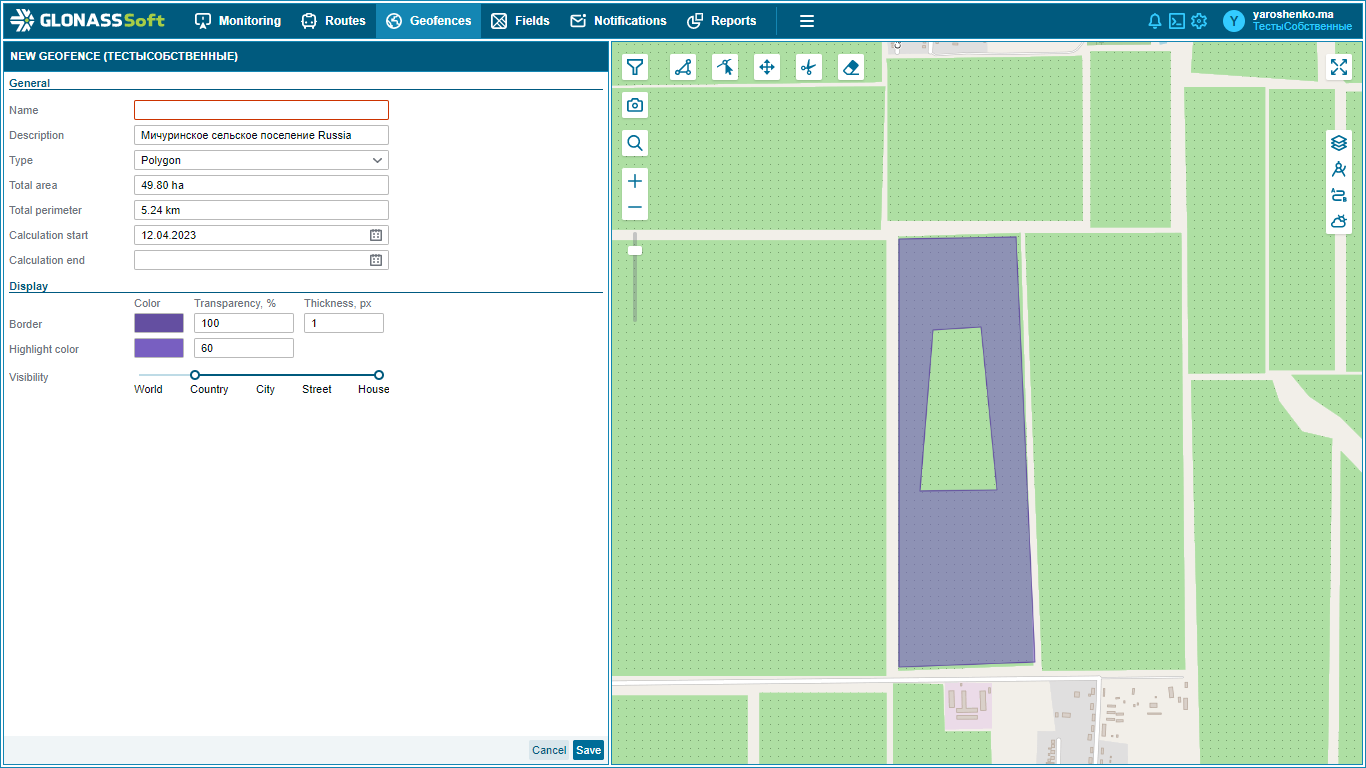
The “General” section of the geo object editing mode contains an active input field for the name of the geo object and reference (inactive) fields for displaying the area and perimeter of the geo object. The data in the “Area” and “Perimeter” fields will appear after the geo object is drawn on the map. The “Display” section contains settings for displaying the geo object on the map. These are such settings as the color, transparency and thickness of the geo object contour line, the color and transparency of the geo object fill, and the setting of visibility on the map of geo objects depending on the scale of the map.
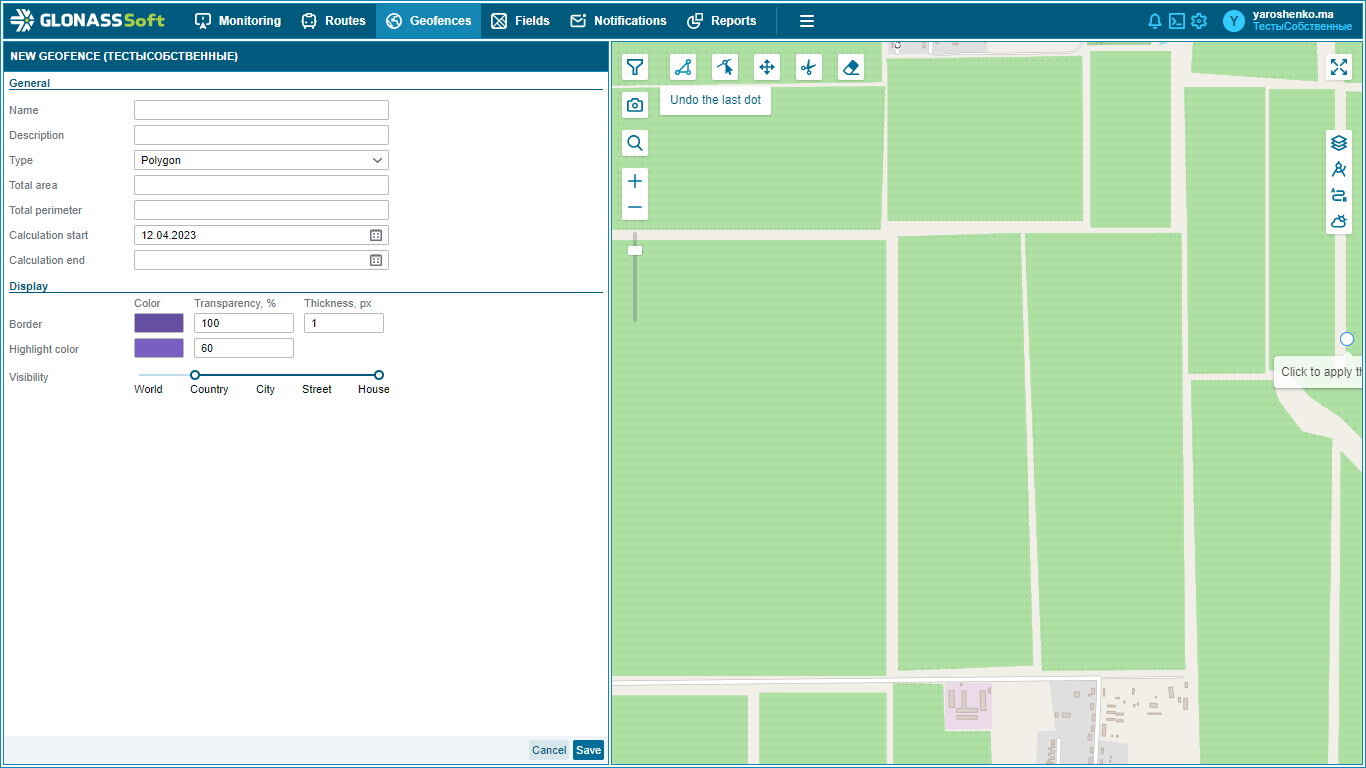
When creating and flexible configuration of the geometry of a “Geoobject” or “Field”, the tool “Draw polygon” is used  . It is necessary to click on the map where you are going to draw the "Geoobject" and mark the points in the future.
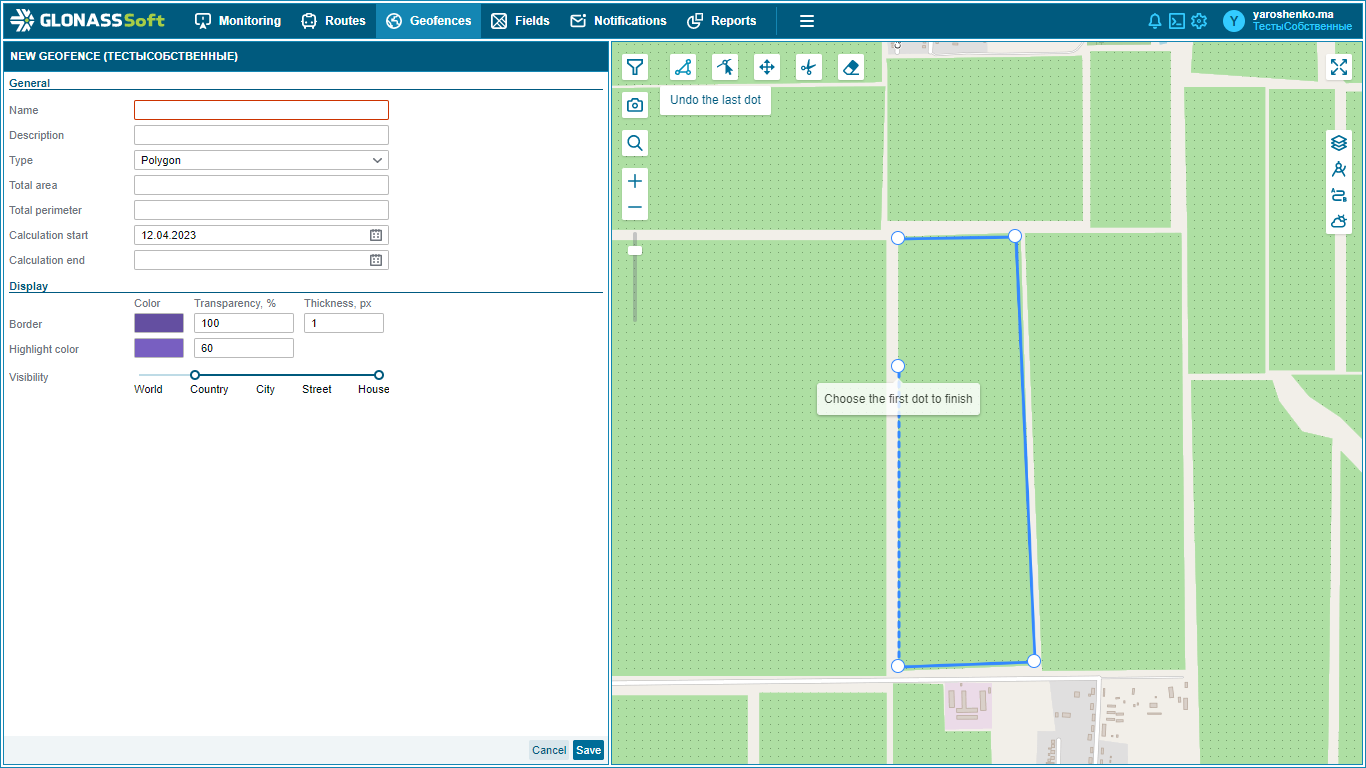
When you need to finish drawing - just double-click on the last point and the geo object will be generated.
When creating a geo object, its area and perimeter are automatically calculated, you can also change the borders and color fill.
When creating a geofence over 1 million hectares. The system warns the user about invalid sizes of the created geo object.
There are also restrictions on the number of created geo objects. They can be created no more than 5 thousand pieces. And the total area of all geo-objects is limited - no more than 10 million hectares. These restrictions are placed in a convenient form in the “Clients” section of the Control Panel. Next to the columns “Geofence limit” and “Total area limit” there is a column with data on the available number of geofences and areas.
Limits on the total area and quantity can be changed. To do this, you need to contact technical support. The area limit of one geofence cannot be changed.
When editing a Geo object, you can also use the button “Edit shape points”  .
.
When creating and editing a Geo object, additional tools can be used:  - “Cut”
  - “Drag shape”
  - “Delete layer”
The “Cut” tool allows you to exclude individual zones from the area of a Geoobject.
Tool “Drag figure” - allows you to move the selected area to another place on the map.
Delete Layers tool - deletes the drawn outline of a geo object.
When working with geo objects, the following buttons are used:.

To delete a geo object, select the geo objects to be deleted and click the button  .
.
To create a geo object, you can also use the “Export/Import” function 
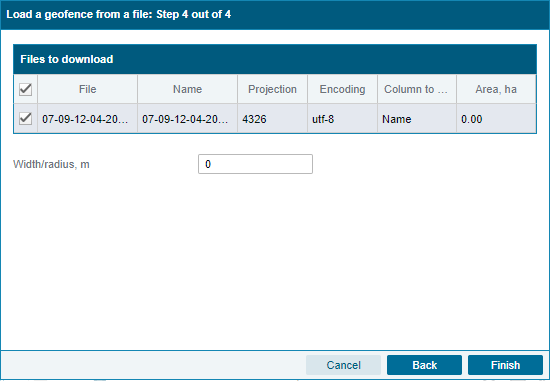
In this case, the geoobject file upload wizard will appear, allowing you to upload geoobject files in KML, KMZ, CSV, ShapeFile and MapInfo formats - files with vector geo-data. In the settings wizard, you can change the stylistic parameters: color, fill, line thickness, etc.

At the final step, data on such parameters as projection, encoding, and area of loaded geo objects are displayed.
At the last step, you can specify the width and radius of the geo object.
It should be noted that the area of geo objects is indicated without increasing the width and radius.
Calculation of geo-events.
The start and end dates for the calculation of geo-events indicate the period of activity of the geo-object - the period during which the events of geo-objects are counted. By default, when creating a geo object, the creation date is set as the start date for calculating events, while the calculation end date is not set.
On import, the start date/end date is set to the creation date
Start date is required
Recalculation back starts only after the field is created, after editing it does not start
To edit the start and end dates of calculations, use the corresponding section in the menu.
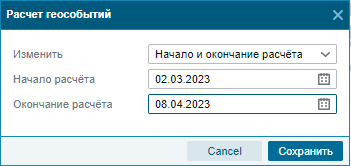
You can edit the calculation date, both for one geo object and for a group.
User settings for geo objects.
Custom settings for displaying objects and events can be made using the “Settings” tool on the corresponding tab.
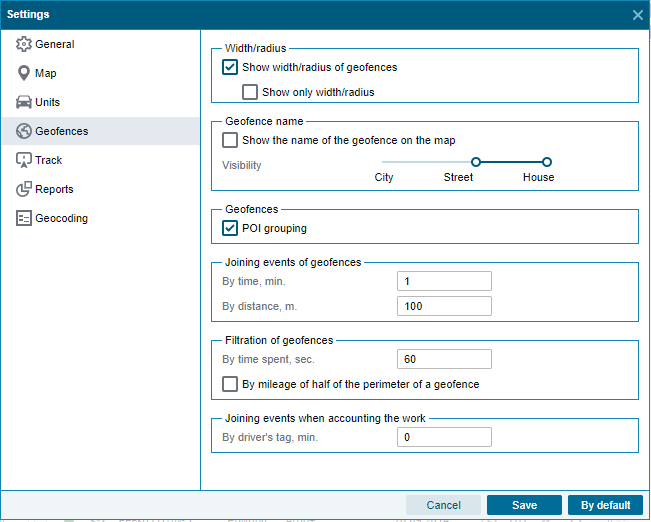
Having opened “Settings”, you need to select the sub-item “Geoobjects”.
Here you can configure:
1. Visibility of geo objects on the map:
setting the visibility of the width and radius of geo objects.
setting the visibility of the names of geo objects on the map.
possibility of grouping POIs.
2. Filtering and combining events:
combining events and geo objects;
filtering geo objects by time of visit along ½ of the perimeter;
merging of events in work accounting.