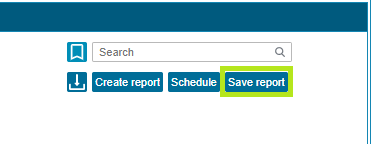
Save report
The GlonassSoft system has the ability to save the selected list of objects, geoobjects and fields for the selected report.
To save the report and its elements, go to the Reports tab , where you need to click the Save report button :
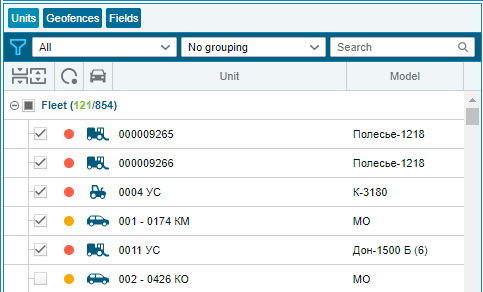
A window will open where you need to specify the type of report you want to save. Also provide a name for the saved report.

Then, in the left part of the window, select those objects, geoobjects or fields that you want to constantly use with this report.
After you have specified everything you need to save the settings by clicking the Save button at the bottom of the screen.
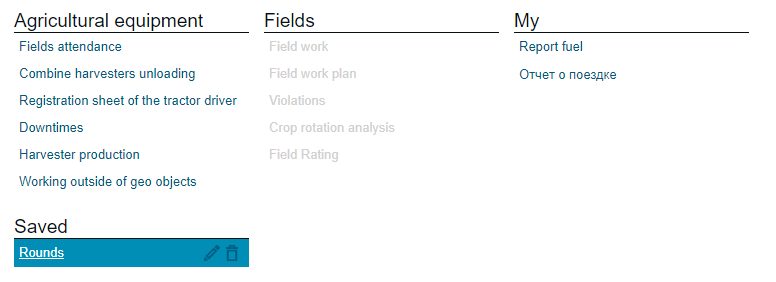
After that, the Saved reports column will appear in the list of reports , where all your saved reports will be located.
By selecting this report, you will automatically have those objects, geoobjects and fields that you specified when saving. All you have to do is select a period and click Build .
When exporting such a report, the name of the saved report will appear in the name of the exported file. Thus, you can name the report "Route No. 7", and upload it to a file with report data, which will be called Route No. 7_7TS_01.08.22-31.08.22.xlsx.
Also, if you select grouping, for example, by departments, when building a report, then up to three departments will be displayed in the file name. If the division was not completely selected, then the number that was selected among them will be displayed in the file name. An example of the name of such a file: Route No. 7_Podolsky_01.08.22-31.08.22.xlsx