Export objects
Export window: Object selection is invoked by pressing the button in the Export column, in the Objects line.
Export: Select object
Options: Export destination , Search , list of objects
At this stage, select the export destination and the objects that we want to export.
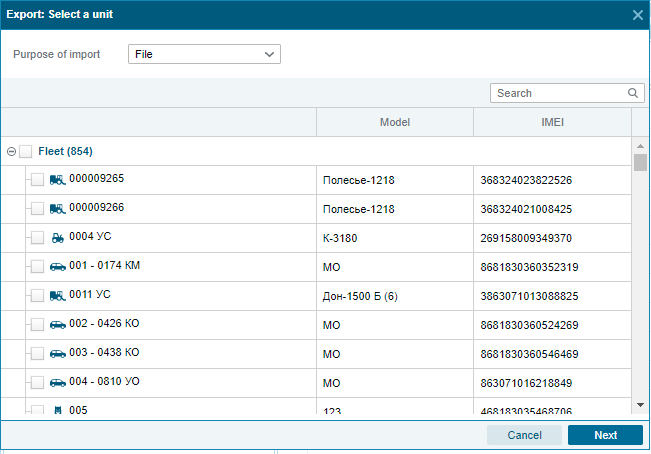
Destination of export - a field, when clicked, a list of two options drops out: File and Element
File - in the last step, the data will be exported to a file and downloaded to the user's computer.
Element - in the last step, the data will be exported to an existing element in the system, that is, the last import step will be used Import : Import Destination .
Search - it is possible to search for objects from the list in the string. A search is performed by Object, Model and IMEI.
If one object or none is selected, the Export Destination can be either File or Item .
If two or more objects are selected, the Export Destination is set to File . The field is blocked until the number of selected elements becomes one or none.
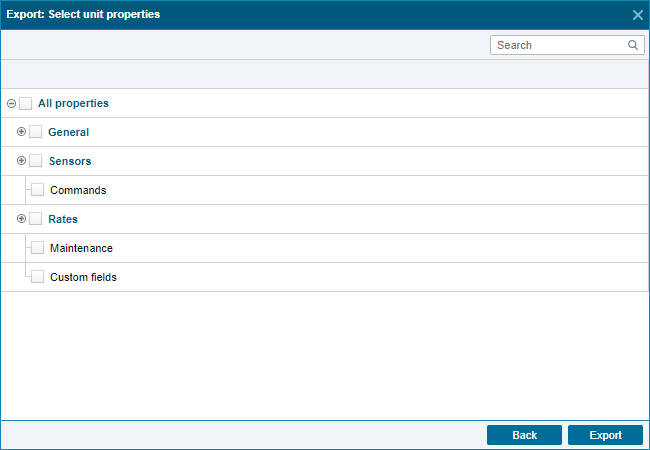
Export: Select object properties
In this window, you select the exported elements of the object. Depending on the number of previously selected objects and the destination of the export, the appearance of this window changes.
This window contains Search , list Object Properties
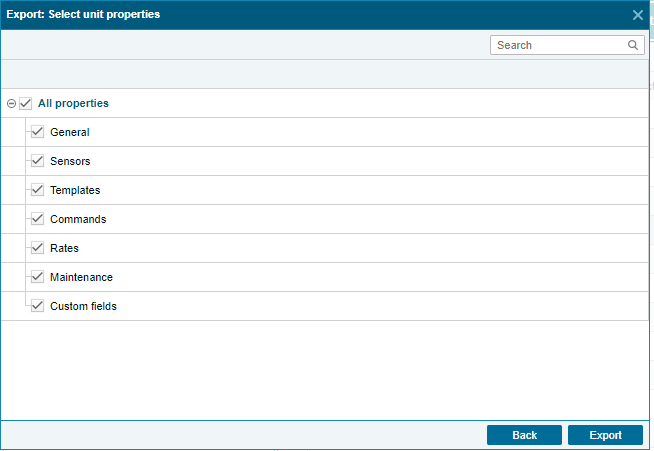
Exporting a Single Object with Destination The file looks like this:
The search is performed by the name of all properties in the list.
In the Object properties list , in the order of the hierarchy, all the properties of the object are located, namely:
All properties
- Are common
- Object name
- IMEI
- Device type
- Object Model
- Subdivision
- Telephone
- Sensors
- (List of available sensors)
- Teams
- (List of available command templates)
- Norms
- Current mileage
- Hours
- Normal flow
- Normal idle
- THAT
- (List of available maintenance)
When selecting multiple objects in the Export: Select Object window , we cannot select specific sensors and models. The Export: Select object properties window will look like this:
Only categories of properties are available here, without specifying the properties themselves.
In the two cases above, the next step will be to create properties files from the selected objects.
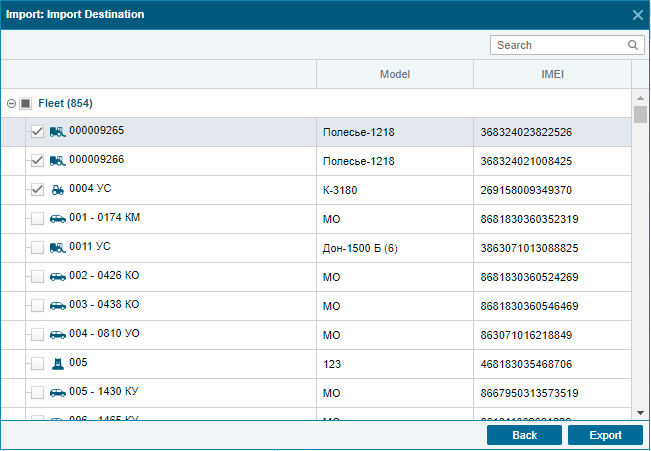
In the following case, if one object was selected in the Export: Object selection step and the export destination was Element , then the Import: Object properties selection window opens :
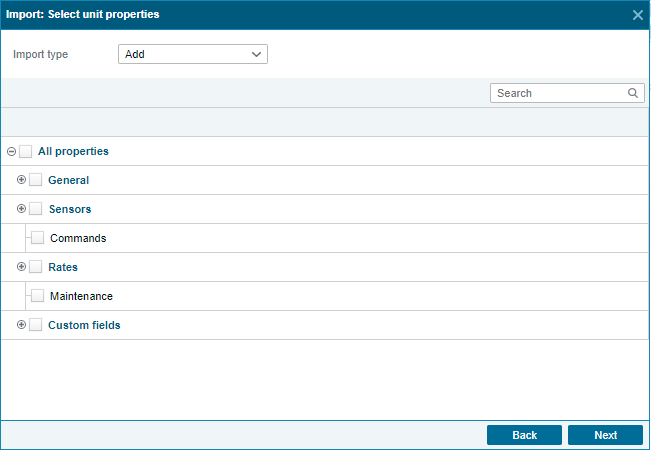
The Import Type option has been added . It is responsible for how the selected properties will be written to the object. There are three types of them: Replacement , Merge , Addition .
Replace - replaces all properties with previously selected properties in the file.
Merge - new data is added to the old. If the old and new elements have the same name, then the old elements are replaced with new ones.
Append - new data is added to the old. In this case, elements with the same name remain untouched.
Selecting the Replace type displays all the available properties listed above.
When you select Merge, the following properties are available:
- Sensors
- (List of available sensors)
When you select Add, the following properties are available:
- Sensors
- (List of available sensors)
- Teams
- (List of available command templates)
- THAT
- (List of available maintenance)
- Custom fields
- (List of existing custom fields)
If a model or division is added that the client does not have, then the new data is entered into the client's directory and written to the object.
By clicking on the Import button , the properties selected in the Import: Select object properties step, the object selected in the Export: Object selection step , will be imported into the objects selected in the Import: Import destination step .